


How to Repair a Metal Roof? Fix Leaks, Rust & Damage Like a Pro
A leaking or damaged metal roof can quickly turn into a homeowner’s worst nightmare, especially when water starts seeping through your ceiling during a heavy storm. The good news? Learning how to repair metal roof issues is more straightforward than you might think, and many common problems can be addressed before they spiral into costly disasters. Whether you’re dealing with rust, loose fasteners, punctures, or seam separations, this comprehensive guide will walk you through everything you need to know to restore your metal roof to peak performance.
Metal roofs are renowned for their durability, often lasting 40-70 years with proper maintenance. However, even the toughest roofing system requires occasional repairs to maintain its integrity.
Why Metal Roof Repairs Matter More Than You Think
Ignoring even minor metal roof damage can lead to serious structural issues throughout your entire home. Water that penetrates a compromised roof doesn’t just damage your attic insulation and ceiling drywall, it can trickle down through walls, ruin electrical systems, and even compromise your home’s foundation over time.
In fact, water management problems often start at the roof and cascade downward, creating cumulative damage. If you’ve ever wondered about how neglected drainage systems can cause foundation problems, the same principle applies to roof leaks: small water intrusions that go unaddressed compound into expensive structural repairs.
Common Metal Roof Problems You’ll Encounter
Before you start repairs, it’s essential to identify what you’re dealing with. Metal roofs typically suffer from a handful of recurring issues, each requiring a slightly different approach.
1. Leaks and Punctures
Falling tree branches, hail, and even foot traffic during installation can puncture metal panels. These holes, no matter how small, are prime entry points for water.
2. Loose or Missing Fasteners
Over time, screws and nails can back out due to thermal expansion and contraction. Missing washers or rusted fasteners create gaps where water seeps through.
3. Seam Separation
Standing seam and overlapping panel joints can separate as the roof ages, creating channels for moisture infiltration.
4. Rust and Corrosion
While modern metal roofs are coated to resist rust, scratched or worn coatings can lead to oxidation, especially in coastal environments.
5. Damaged Flashing
Flashing around chimneys, vents, and skylights often fails before the panels themselves, creating notorious leak points.
Tools and Materials You’ll Need
Gathering the right supplies before climbing onto your roof saves time and prevents dangerous trips up and down the ladder. Here’s what you should have on hand:
- Soft-soled shoes with excellent grip
- Safety harness and roof anchor
- Wire brush and sandpaper (medium grit)
- Mineral spirits or denatured alcohol for cleaning
- Roofing sealant or butyl tape compatible with metal
- Sheet metal patches matching your roof material
- Self-tapping metal roofing screws with neoprene washers
- Caulking gun
- Cordless drill with metal-rated bits
- Rust-inhibiting primer and matching paint
- Tin snips or metal shears
How to Repair a Metal Roof: Step-by-Step Guide
Step 1: Inspect and Identify the Damage
Start with a thorough inspection on a dry, sunny day. Look for obvious signs like dents, holes, rust spots, missing screws, and lifted seams. Check the attic from below for water stains or daylight peeking through; these reveal leak locations you might miss from above.
Step 2: Clean the Damaged Area
Use a wire brush to remove rust, debris, and old sealant from the repair zone. Wipe the surface with mineral spirits to remove oil, dirt, and oxidation. A clean surface is non-negotiable for a long-lasting repair; sealants and patches simply won’t bond to grime.
Step 3: Repair Small Holes and Punctures
For holes smaller than a quarter, apply a generous bead of metal roof sealant directly into and around the puncture. For larger holes, cut a sheet metal patch at least 2 inches larger than the damage on all sides. Apply sealant around the hole, press the patch firmly into place, and secure with self-tapping screws every 2 inches around the perimeter.
Step 4: Replace Loose or Missing Fasteners
Remove any backed-out screws and inspect the holes. If the existing hole is enlarged or stripped, use a slightly larger replacement screw. Always use screws with neoprene washers designed specifically for metal roofing; standard hardware will fail prematurely.
Step 5: Seal Separated Seams
Clean both sides of the seam thoroughly. Apply butyl tape along the seam, then press the panels together firmly. For added protection, run a bead of compatible sealant over the joint and smooth it with a putty knife.
Step 6: Address Rust Spots
Sand the rusted area down to bare metal, feathering the edges into the surrounding coating. Apply a rust-inhibiting primer, allow it to dry per manufacturer instructions, and finish with paint matching your roof color. This prevents the rust from returning and blends the repair visually.
Step 7: Repair or Replace Flashing
For minor flashing issues, clean the area and apply a thick layer of roofing sealant. Severely damaged flashing should be replaced entirely; remove the old flashing, install new pieces with proper overlap, and seal all edges meticulously.
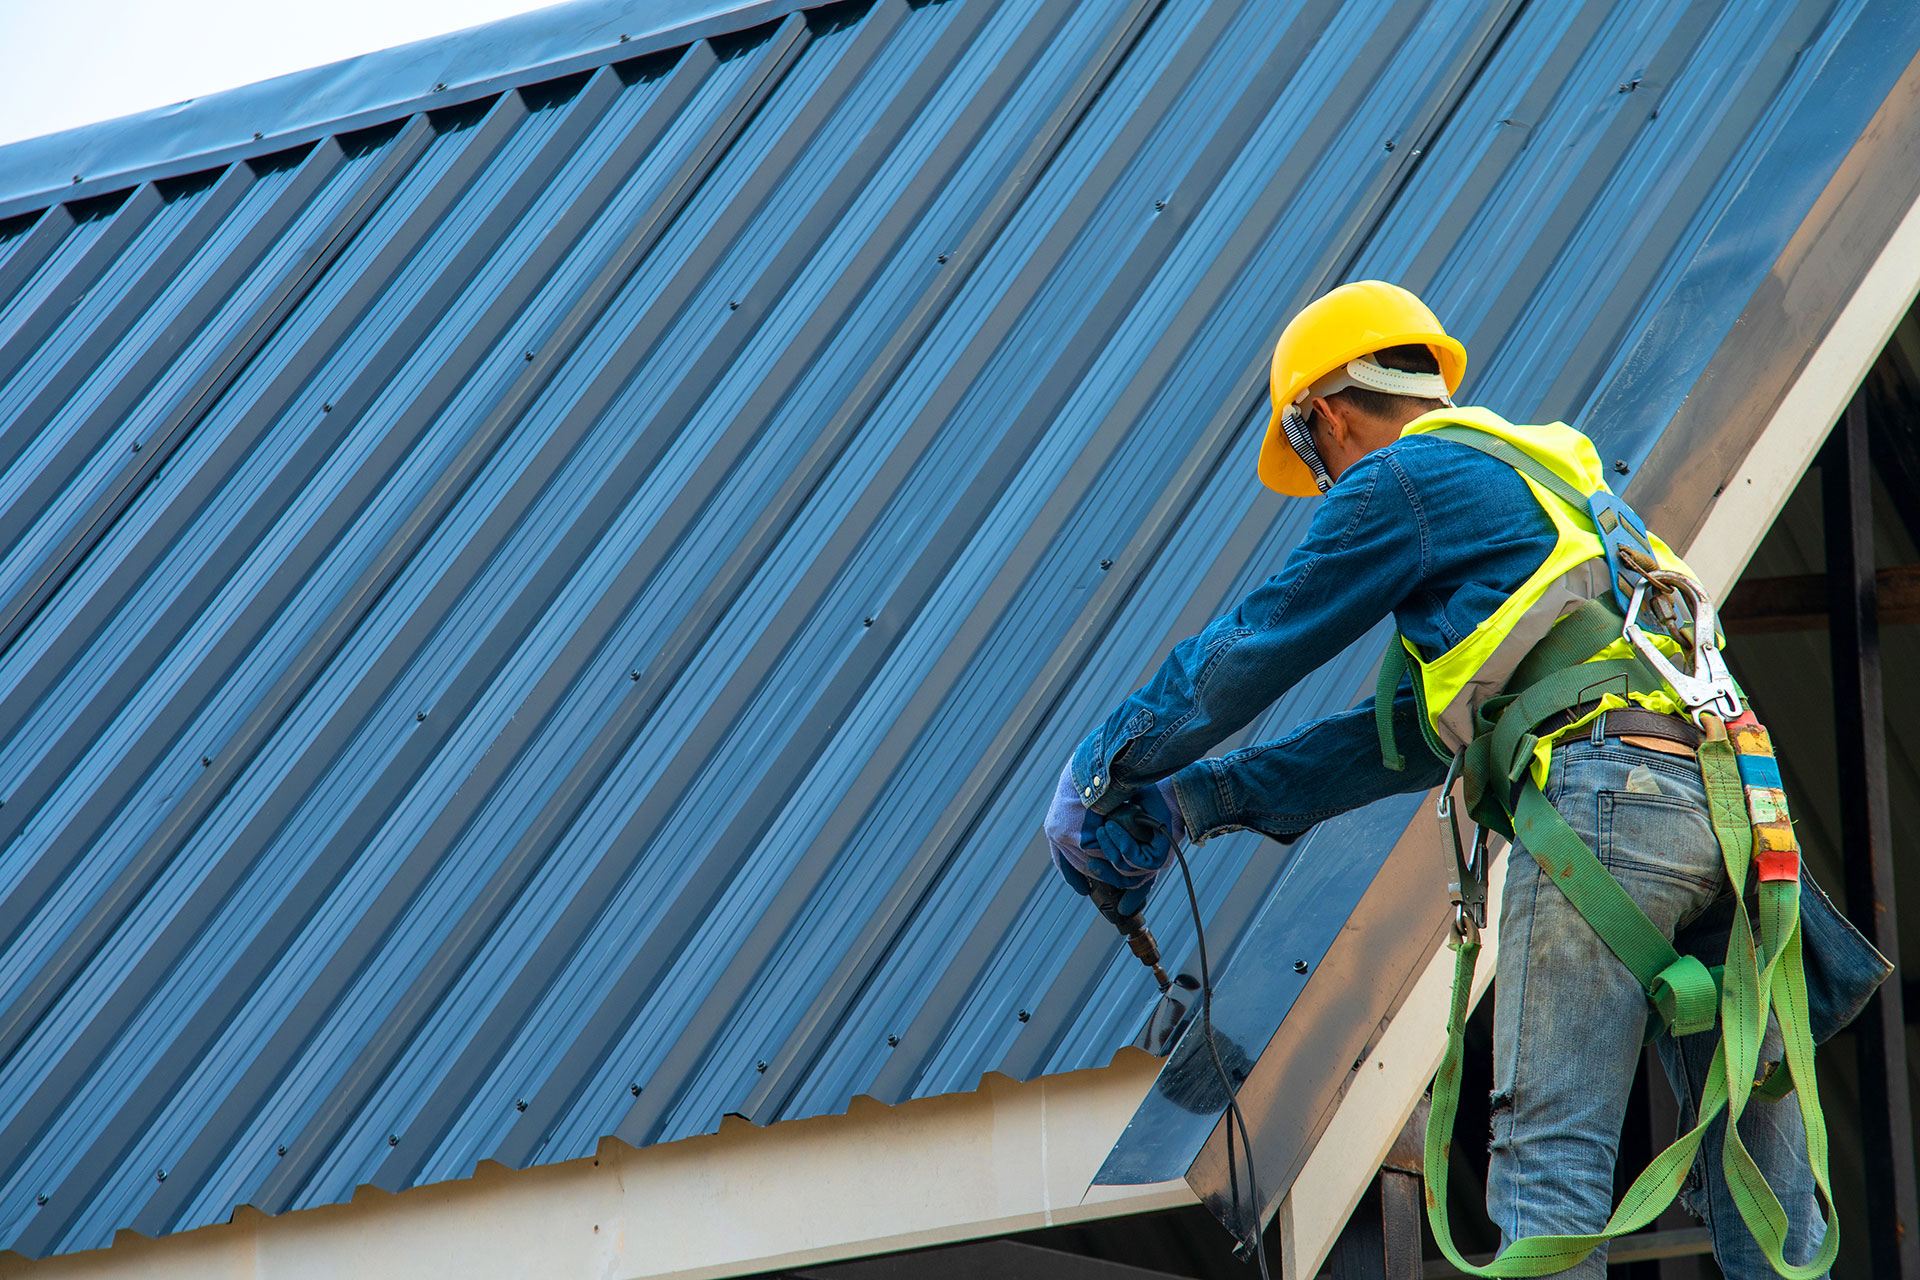
Safety Considerations You Can’t Ignore
Metal roofs are notoriously slippery, and falls are the leading cause of DIY roofing injuries. Before attempting any repair, take these precautions seriously:
- Never work alone; always have a spotter on the ground
- Use a properly anchored safety harness
- Avoid working in wet, windy, or icy conditions
- Keep tools tethered or in a roof-safe bucket
- Maintain three points of contact when moving
- Stay off the roof if you’re uncomfortable with heights
Preventive Maintenance Tips for a Longer-Lasting Metal Roof
The best repair is the one you never have to make. Consistent preventive maintenance dramatically extends your metal roof’s lifespan and keeps small issues from becoming big ones.
- Inspect twice yearly: Schedule thorough inspections in spring and fall
- Clean gutters and valleys: Remove leaves, branches, and debris regularly
- Trim overhanging branches: Prevent abrasion and falling-limb damage
- Check sealants annually: Reapply where cracking or deterioration appears
- Touch up scratches promptly: Prevent rust before it starts
- Tighten fasteners every 5-10 years: Address thermal cycling effects
Final Thoughts
Knowing how to repair metal roof damage is one of the most valuable skills a homeowner can develop. From sealing small punctures to replacing fasteners and addressing rust, most common issues can be tackled with the right tools, materials, and a healthy respect for safety. Acting quickly when you spot damage protects not just your roof, but your entire home from the cascading effects of water intrusion.
Remember, your metal roof is a major investment that should last for decades when properly maintained. Combine timely DIY repairs with professional inspections every few years, and you’ll get the maximum lifespan and performance from your roofing system. When in doubt, don’t hesitate to call a qualified roofing professional; their expertise and warranties offer peace of mind that’s worth every penny.


No Comments
Sorry, the comment form is closed at this time.